


A leaking roof can turn into a costly headache fast. Water intrusion doesn’t just damage your shingles—it seeps into the decking, insulation, and drywall, leading to mold, rot, and expensive repairs. If you’re waiting for professional help, covering the damaged roof area with a tarp is the best way to stop further water damage.
Below is a clear, step-by-step guide for homeowners who want to understand how to tarp a roof safely and effectively. Or if you would like to hire someone to assist you with temporary roof tarping, contact us today.
When and Why to Tarp Your Home Roofing System
Roof tarps are a temporary solution to prevent water from entering your home until a professional can make permanent roof repairs. It’s most commonly used after:
- Storm damage from wind, hail, or heavy rain
- Missing shingles or slate
- Fallen branches or debris impacts
- Leaks appearing before a full roof repair can be scheduled
Even though it’s temporary, a properly secured tarp can protect your home roof and your belongings from serious water damage.
Can You Do It Yourself?
Yes, but proceed with caution. Tarping your roof on your own is possible, but it requires careful consideration and preparation. Homeowners who are comfortable with heights and have some DIY experience can undertake this task, but safety should always be the top priority!
Before you begin, make sure you have:
- A sturdy ladder and someone to spot you
- Non-slip shoes, gloves, and a safety harness
- A helper to hold materials or hand you tools
- A dry, calm day to work—never tarp a roof during a storm
Working on a roof is risky, even on a single-story home. Keep these three important roof safety tips in mind—always use safety gear, avoid walking backward, and never work on a wet or icy surface. If at any point you feel unsafe, call a roof professional. No emergency fix is worth risking injury.

First: Inspect and Assess the Roof Damage
Before you place a roof tarp, evaluate the extent of the damage.
- Look for missing shingles, holes, or torn areas.
- Check the attic for water stains or damp insulation to locate the source of the leak.
- Estimate how large the damaged section of the roof is. This determines how big your tarp needs to be.
If the leak is near a valley or ridge, you may need to tarp multiple sections of the roof to cover it completely.
Then: Measure and Prepare
Choose a heavy-duty waterproof tarp that extends at least 3 to 4 feet beyond the damaged area of the roof in all directions. This overlap ensures full coverage. A quality heavy-duty tarp may cost more than using multiple plastic sheets but prevents the risk of further damage to the roof and interior of your home.
To secure the tarp edges and prevent wind from lifting it, use small 1×2 wooden boards. Wrap the trap edges around the boards before fastening them; this protects the tarp from tearing and gives a stronger hold.
Finally: Position and Secure a Heavy-Duty Tarp
Lay the tarp flat over the damaged section and extend it over the ridge of the roof if possible. This extension of the tarp helps prevent rainwater from running underneath. If extending over the ridge isn’t an option, try sliding the top edge of the tarp under a row of shingles above the damaged area. This allows water to flow down onto the tarp rather than underneath it.
If neither of these steps is possible, apply a thick bead of roof cement or caulk along the top edge to help seal the tarp to the roof.
Use screws or nails with rubber washers to secure the tarp through the wooden boards. Begin fastening at the bottom edge and work your way upward, keeping the tarp tight and smooth to prevent pooling water
Additional Tarping Tips for Homeowners
Every home roof and situation is different, so a few extra precautions can make your temporary repair more effective and longer lasting.
Secure with Wood
Use thin 1×2 boards or similar wood strips along the edges of the tarp. Secure the tarp by screwing through the boards rather than directly through the tarp. This prevents tearing and provides a stronger hold against wind gusts, reducing the risk of the tarp blowing off during bad weather.
Tarping Slate Roofs
Slate and tile home roofs are extremely fragile and can easily crack under pressure. Never nail or screw into slate. Instead, weigh down the tarp with sandbags placed gently around the edges. This method helps protect the roofing surface while keeping the tarp in place until professional repairs can be made.
Flat Roofing Alternatives
Tarping a flat roof effectively is nearly impossible since there’s no pitch for water to run off. For small areas, you can apply roof cement or mastic as a temporary patch. Adding a thin layer of kitty litter or sand over the top helps absorb water and prevent slipping. However, this should only be a short-term fix until a roofer can perform proper repairs.
Expect Minor Shingle Damage
Keep in mind that attaching a tarp will almost always cause some level of shingle damage. Screws, nails, or adhesives can lift or break existing shingles. Once the tarp is removed, be prepared for a few replacements or a small repair to restore the roof’s watertight seal.
RoofPRO: Maryland’s Trusted Roofing Experts
When roof damage or a leak strikes, RoofPRO provides emergency tarping and roof repair services across Maryland to end water intrusion fast and protect your home.
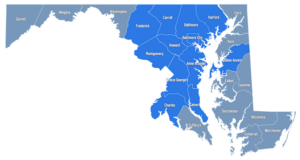
With over 20 years of local experience, we’ve helped thousands of homeowners in Anne Arundel, Howard, Montgomery, Prince George’s, Carroll, and Baltimore counties. Our team is fully licensed and insured (MHIC #89605) and certified by CertainTeed, GAF, and Owens Corning, ensuring all of our roofing services meet top industry standards.
We handle everything from storm damage tarping to full roof replacements, using high-quality materials and proven repair methods. Every job includes a thorough inspection, clear communication, and professional workmanship backed by strong warranties and an A+ BBB rating. Contact us today for a free quote.
Article Updated November 1, 2025.

Author Bio
Tim Taylor – Owner & Founder of RoofPRO
Tim Taylor began his roofing career in 2003 and founded RoofPRO in 2004 with a mission to fix the poor workmanship that often causes roof leaks. With over 20 years of hands-on experience, he’s earned elite credentials like CertainTeed’s ShingleMaster Wizard certification, HAAG inspection certifications, and OSHA safety training. His expertise in leak repair, flashing repair, and post-storm restoration has made RoofPRO one of Maryland’s most trusted roofing companies. Tim continues to lead with the same principle that built his reputation—roof it right the first time.