Roof vent leaks often go unnoticed until they cause real problems. If left untreated, they can lead to costly damage. Understanding what causes these leaks—and how to fix them—is key to protecting your home and roof. Read on to learn more, or contact our team at RoofPRO today!
Common Causes of Leaking Vents
Most leaks start small—just water sneaking through a weak spot in the flashing. When flashing dries, cracks, or loosens, rain can slip under the shingles and find its way inside.
Sometimes the issue isn’t the flashing at all. It could be a cracked cap, a loose fastener, or poor sealing around a roof opening. Once water gets underneath, it can travel along the roof deck before finally showing up inside, often far from where it started.
Every roof type has its own trouble spots. Flat roofs might have loose membrane seams, while shingle roofs can take a beating from wind and storms along ridges or valleys.
Below are some of the most common specific causes we find during roof inspections:
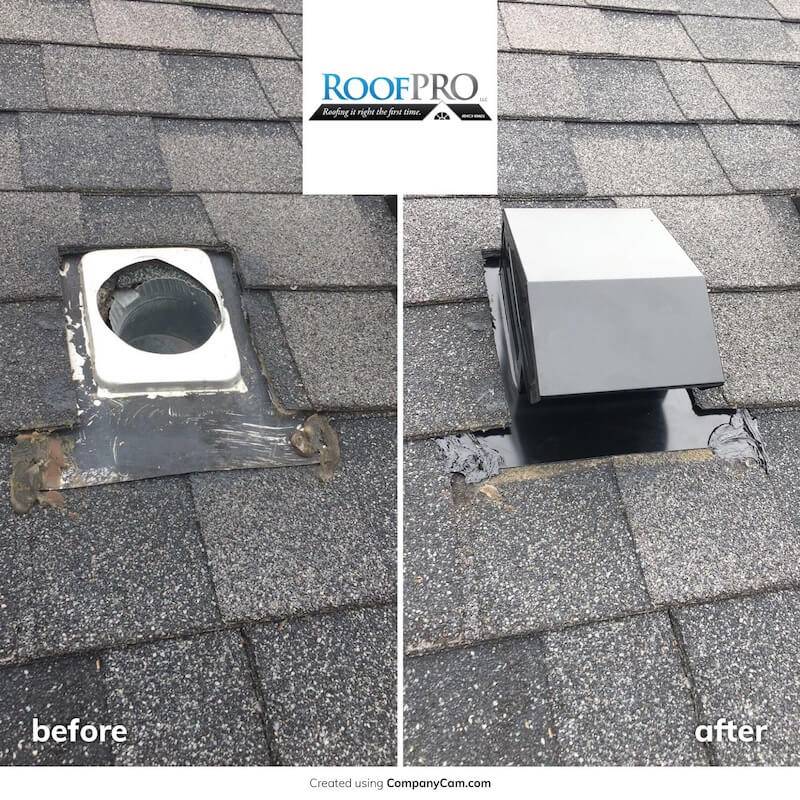
Flashing Damage
Damaged flashing is one of the most common causes of roof leaks. It covers the transitions between roof sections and creates a watertight barrier around walls, pipes, and valleys. Over time, flashing can deteriorate due to weather exposure, leading to gaps where water can seep through and cause problems to your interior.
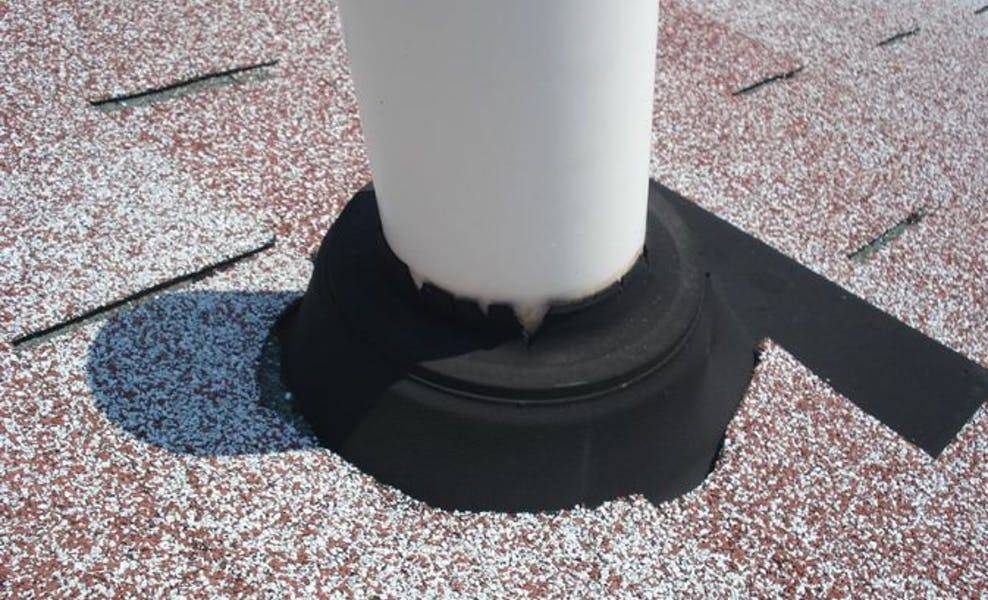
Broken Pipe Flashing (Vent Boot)
The flashing around vent pipes—called a vent boot—is another common weak point. When these collars crack or loosen, water can enter the home around the pipe’s base. Routine and professional inspection can help identify these issues before they lead to serious leaks and damage to your home!

Poorly Sealed Seams
Improperly sealed seams around flashing are a less obvious but equally problematic cause of leaks! These seams should be securely sealed during installation, but exposure to the elements can weaken the sealant over time, necessitating reapplication or repair. While this can be tough to diagnose initially, it can be one of the easier fixes when it comes to these issues.
Why a Leaking Vent Should Never Be Ignored
Leaks from your roof are more than just a minor inconvenience; they’re a significant concern that can lead to a host of problems within your home and attic. Over time, even a small leak can compromise the structural integrity of your house and roof deck, leading to issues like weakened beams and rafters, damaged ceilings, and mold growth!
Furthermore, water infiltration can ruin insulation, electrical wiring, and even personal belongings. Therefore, it is vital to address any kind of leak promptly to prevent extensive and costly damage.
Moisture and Mold Build-Up in Your Attic
When leaks go unchecked, they can cause visible water damage inside your home—stained ceilings, peeling paint, or warped wood. Over time, trapped moisture can also create the perfect environment for mold growth, which not only affects air quality but can also damage your home’s structure.

How We Inspect the Compromised Area
Roof problems aren’t always easy to spot from the outside. If you don’t see visible cracks or gaps, check the attic after a heavy rain. Look for water stains on the decking, streaks running down vent pipes, or damp insulation below.
Sometimes you’ll notice stains on the insulation or ceiling but not the rafters or decking. This happens when water travels between roof layers and drips directly into the attic through small gaps or joints in the wood.
We’ve also seen Maryland homes with bathroom or dryer vents that were installed incorrectly. Instead of venting outdoors, they are sometimes routed into a ridge cap or box vent that is too small. This setup traps warm air, which creates condensation that drips back into the attic. The result can look like a roof leak even when it is not raining.
At RoofPRO, we never guess where leaks start. The process begins inside the home, measuring from the ceiling stain to a fixed point such as a wall or attic hatch. In the attic, we match those measurements to locate the same area from above. Once the spot is found, we move insulation aside and follow the water trail up the underside of the decking until we locate the true entry point.
After confirming the location, we measure again on the roof and inspect the flashing, shingles, and nearby features like chimneys or valleys. This detailed approach removes the guesswork and ensures the real problem is identified and repaired, not just temporarily covered.
This method eliminates guesswork and ensures the real problem gets fixed, not just covered up.
How to Fix a Leaky Roof Vent
Fixing a leaky vent the right way takes more than a bead of caulk. A lasting repair means removing the problem area, inspecting what’s underneath, and rebuilding it correctly from the deck up. Here’s how it’s done.
1. Remove the Vent and Surrounding Materials
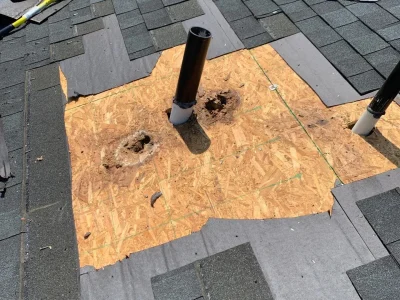
The first step is to strip away the old vent and the shingles around it. This exposes the flashing, underlayment, and decking so you can see how far the water damage extends. Patching over worn or cracked materials might stop the leak for a few weeks, but it never lasts.
2. Inspect and Replace Damaged Roof Decking

Once the area is open, the decking should be checked carefully. Any soft, dark, or rotted wood needs to be replaced. A solid deck is essential for fastening the new vent and preventing future leaks. This step also helps eliminate trapped moisture that can lead to mold or structural issues later.
3. Install Ice and Water Shield Underlayment
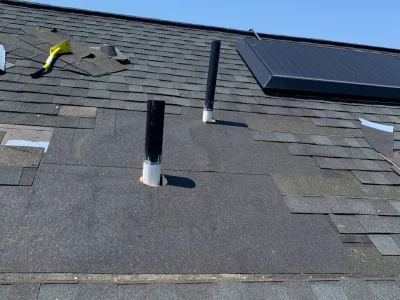
Before reinstalling the new vent, it’s best to apply ice and water shield around the opening. This self-adhering underlayment creates a watertight seal under the shingles and around nail penetrations. It provides extra protection against leaks, wind-driven rain, and Maryland’s freeze-thaw cycles that can cause ice to build up.
4. Install the New Roof Vent
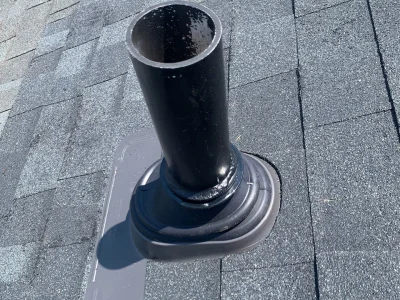
Next, the new vent is installed following the manufacturer’s exact specifications. Correct placement, fastening, and sealing make all the difference. An improperly aligned vent or missing fasteners can create new leak points, so precision matters here.
5. Reinstall Roofing Materials and Seal Everything Properly
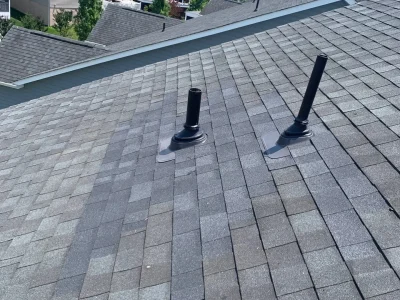
Once the vent is secured, the surrounding shingles and materials are replaced and sealed. The flashing must be snug and layered properly with the shingles to direct water away from the vent. The goal is to make the repair blend seamlessly with the rest of the roof while ensuring watertight protection for years to come.
How to Prevent Leaks in the Future
The best way to avoid a leak is regular maintenance. Schedule a professional inspection once a year, especially after harsh storms. Keep debris cleared around vents and check seals for cracks or separation. Replacing aging pipe collars every 8–10 years can prevent most flashing failures before they start.
Two types of vents cause most of the leaks we see: pipe vents and ridge vents. Cheap rubber pipe flashings tend to dry out and crack after about seven years. Premium versions, like the Ultimate Pipe Boot, are made to last the life of the shingles.
For ridge vents, skip the aluminum models that dent easily. We recommend a shingle-over ridge cap with a durable plastic base, such as the Owens Corning VentSure. It holds up better against wind-driven rain and provides better long-term protection.
Can I Fix a Leak on My Own?
Fixing a leaky vent on your own is a feasible task for those with basic DIY skills and comfort working at heights. It involves several steps, including assessing the damage, removing old sealant, applying new caulk or sealant, and possibly replacing the vent’s gasket or collar. While the process can be straightforward, it’s crucial to prioritize safety by using a sturdy ladder, wearing appropriate footwear, and considering safety gear like gloves and eyewear!
However, if the damage is extensive or if you’re unsure about any part of the process, it’s advisable to seek professional help. Experts like RoofPRO have the experience, tools, and knowledge to safely and effectively repair vent leaks, ensuring long-term solutions and peace of mind. Reach out to our team today for more information and a free estimate.
NOTE: Use Extreme Caution When Working on a Roof
For those willing to take on these kinds of repairs themselves, it’s vital to make safety a top priority. Working on a roof can be extremely hazardous, especially if it’s steep or wet. While we advise calling a professional for help, those who take on these projects should always use a stable ladder, wear non-slip shoes, and consider using a safety harness when working on steep slopes.
The first step to repairing a compromised vent is to remove any old caulk or sealant from around the base of the vent pipe. This will allow for a clean surface to apply the new pipe flashing, ensuring a more effective and long-lasting seal. If a new gasket is placed over a pipe with old caulk, it can create small places for water it infiltrate.
It’s important to remove the shingles that are directly around the vent pipe. After this, depending on the condition, you’ll most likely need to install new underlayment such as ice and watershield. You’ll want to remove the old material gently so as not to damage the surrounding material.
Place the new flashing over the pipe along with caulk around the outer edge of the gasket as needed. Install the new shingles around the pipe collar and secure it in place. Be sure to secure the older shingles next to the new shingles and caulk any existing fasteners.
FAQ:
Most vent repairs in Maryland fall between $300 and $800, depending on what type of material you have. A standard pipe vent repair usually runs around $400, while replacing damaged venting along the ridge could cost closer to $25 per linear foot.
The price can rise if the decking underneath is rotten or if the home has steep or hard-to-reach sections that require extra safety equipment, something common on 4-story Maryland homes and rowhouses.
Yes, roof vent leaks are common. They often occur due to aging materials or poor installation. Rubber collars usually fail after 7–10 years, while older roofs may develop leaks from worn flashing or storm damage. Regular inspections help catch these problems early. For roofs 20 years or older, leaks usually stem from worn materials or storm damage. Regular inspections can catch these issues early, saving you from costly repairs later.
If you need a quick fix while waiting for a professional repair, you can use roof cement or exterior-grade sealant around the vent’s base. This can slow the leak temporarily but shouldn’t be considered a long-term solution. Once the weather clears, schedule a full repair—temporary patches often fail after the next storm.
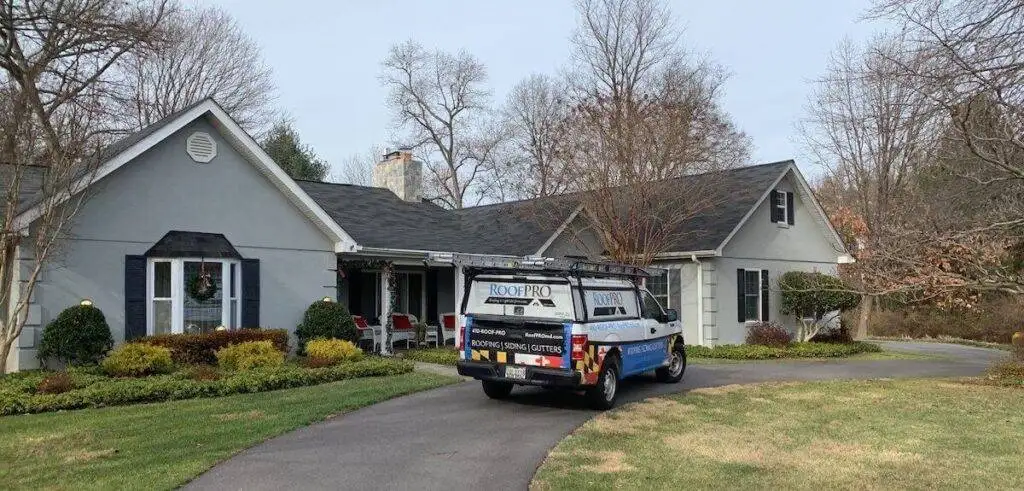
RoofPRO is a Top-Rated Maryland Roofing Company
For nearly twenty years, RoofPRO has proudly served Marylanders far and wide with top-rated roofing solutions. From simple repairs to massive new roof overhauls, our team has the experience and knowledge to get the job done right!
Trusted Solutions for Roof Leak Repairs
RoofPRO’s team of experienced professionals is proud to offer trusted solutions for all types of roof repairs, including vent leaks. We’re committed to delivering high-quality workmanship using the best materials to restore your roof to its optimal condition. As a certified Owen Corning roofing contractor with an A+ rating from the Better Business Bureau (BBB), RoofPRO upholds the highest standards of integrity, reliability, and craftsmanship on every project.
Contact Us Today for a Free Estimate
If you’re facing a leaky roof, vent, or any other issues, reach out to RoofPRO for a free inspection and estimate. Our experts are ready to provide you with efficient, reliable service, ensuring your home is protected from the elements all year round!
Article Updated November 2, 2025.

Author Bio
Tim Taylor – Owner & Founder of RoofPRO
Author: Tim Taylor – Owner & Founder of RoofPRO
Tim Taylor began his career in 2003 and founded RoofPRO in 2004 with a mission to fix the poor workmanship that often causes roof leaks. With over 20 years of hands-on experience, he’s earned elite credentials like CertainTeed’s ShingleMaster Wizard certification, HAAG inspection certifications, and OSHA safety training. His expertise in leak detection, flashing repair, and storm damage restoration has made RoofPRO one of Maryland’s most trusted roofing companies. Tim continues to lead with the same principle that built his reputation: roof it right the first time.


