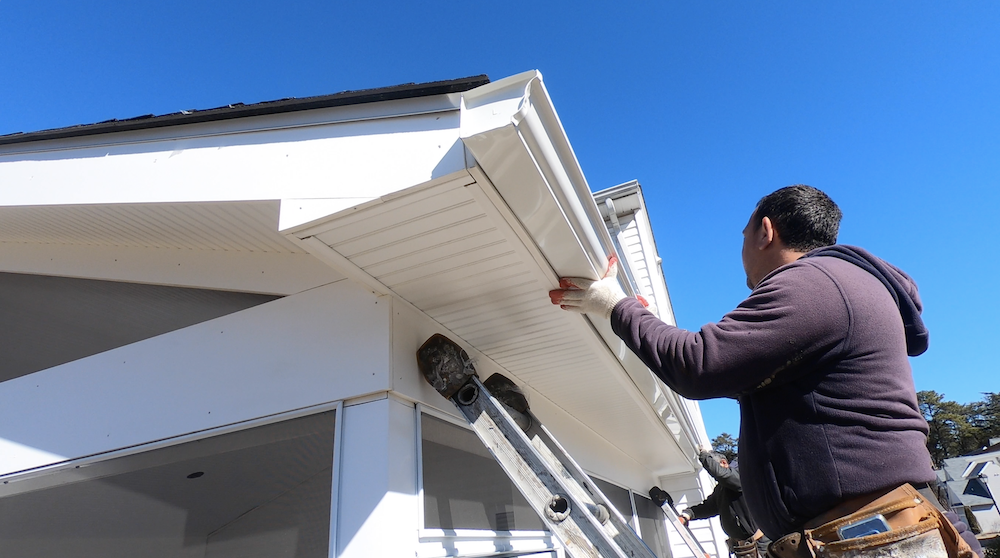
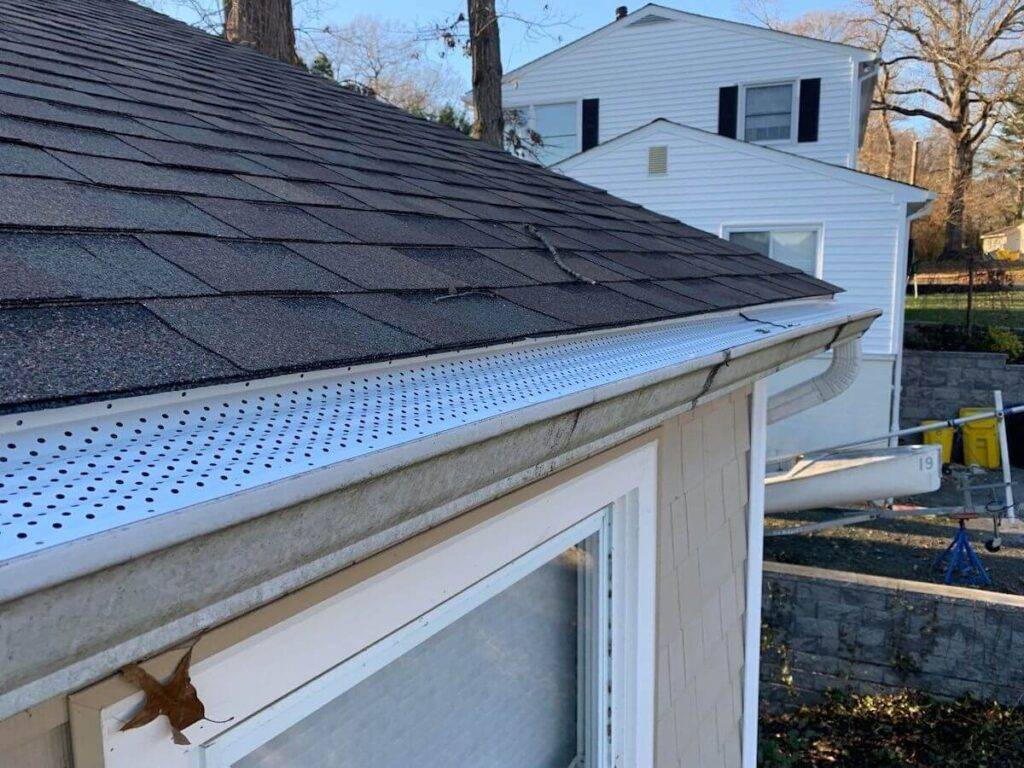
When you think about your roof, you probably picture shingles, gutters, maybe skylights. The drip edge usually does not get much attention. Yet this small strip of metal at the edge of your roof has a big job. It keeps water moving away from the roof deck, fascia, and siding so your home stays dry and solid.
From RoofPRO’s perspective and all roofing manufactures, drip edge is not a fancy upgrade. It is a core part of a healthy roofing system for Maryland homes. In this guide, we will walk through what drip edge is, why it matters in our climate, how it should be installed, and when it makes sense to have a professional roofer handle it.
What Is a Drip Edge?
A drip edge is a metal flashing that sits at the perimeter of your roof. We place it beneath the underlayment along the eaves and sometimes along the rakes. It forms a barrier that directs water away from the fascia and roof deck. When it performs correctly, water exits cleanly into the gutters instead of under the shingles or into the wood framing.
The Purpose of Drip Edge on a Roof
We consistently see the benefits of using a drip edge on every project. It provides a clean exit path for water, helps protect the fascia from rot, and prevents moisture from seeping up under the shingles. Homeowners sometimes ask why a thin strip of metal does so much. The answer comes down to how rain moves along the roof surface. Even a light drizzle runs across the shingles and toward the edges. Without a drip edge, that water can curl back toward the house. With the drip edge installed, the water falls into the gutter system.
During installation, we slide the metal beneath the underlayment at the eaves. This position ensures that any moisture reaching the underlayment drains over the metal rather than settling into the sheathing. The drip edge also supports the edge of the shingles. It prevents sagging and helps the shingle rows hang straight across the entire roofline.
Common Problems From Missing or Improper Drip Edge
If your home has no drip edge, or if it was installed incorrectly, you may notice symptoms long before you can see the actual metal from the ground.
Watch for:
- Water dripping behind your gutters, especially in heavy rain.
- Brown streaks or stains on the fascia and soffits.
- Fascia boards that look swollen, soft, or wavy.
- Paint that peels quickly near roof edges.
- Shingles hanging far beyond the gutter with no metal visible.
- Bent or wavy metal that looks loose.
- Gaps between the shingle edge and the gutter line.
- Ice forming where the roof meets the gutter in winter.
If you spot any of these issues, a professional inspection from RoofPRO can confirm what is happening and whether a simple repair is possible. We often meet homeowners who thought they needed “new gutters,” but the main issue was water getting behind the gutters because of poor drip edge details.
Can Drip Edge Be Installed On An Existing Roof?
Homeowners often ask if they can add drip edge without replacing the whole roof. The answer depends on the age and condition of the shingles.
In some cases, we can carefully lift the first course of shingles, install new drip edge underneath, then refasten the shingles and seal the nail heads. This works best on roofs that are still in decent shape and where the shingles have some flexibility left. When we inspect your roof, we check shingle age, brittleness, and prior repairs before recommending retrofit work.
When Roof Replacement Makes More Sense
If your shingles are near the end of their life, retrofitting the drip edge may not be the best choice. Old, brittle shingles crack when lifted. That creates more potential leak points and extra labor.
In those situations, we walk through roof replacement options with you. When you replace the roof, the drip edge is included as part of a full system, including:
- New underlayment and ice and water shield.
- New flashing around penetrations.
- New or upgraded ridge vents.
- Fresh drip edge around all eaves and rakes.
This approach gives you a clean roof edge and resets the clock on leaks and rot at the perimeter.
Historic and Complex Roof Details
Many Maryland homes, especially in older areas such as Annapolis and Baltimore, feature crown molding, layered fascia, or custom trim details. Adding a drip edge in these cases takes more planning. Our goal is to protect your roof edges without compromising the trim’s appearance. We look at how the drip edge interacts with the existing trim, whether a custom profile or color is needed, and how to maintain your home’s appearance while adding protection.

How Drip Edge Should Be Installed
This section helps you understand the drip edge installation process. It also highlights why many homeowners prefer to let RoofPRO’s qualified roofing and drainage experts handle the work, especially at heights.
Proper Placement at the Eaves
The drip edge is part of a larger roofing system, not a stand-alone strip of metal. Proper installation starts along the eaves, where the drip edge sits on top of the roof deck and beneath the underlayment or ice and water barrier based on code and manufacturer guidance. The vertical leg covers the edge of the deck and fascia while the horizontal leg projects into the gutter to guide water into the trough. Nails are driven into the roof deck rather than only into the fascia and are spaced consistently. When we install new shingles on a Maryland home, we pay close attention to this sequence, including how the ice and water shield begins and how it overlaps the drip edge.
Installation at the Rakes
Along the rakes, the drip edge usually runs over the underlayment, supports the shingle edges, and helps with wind resistance. Nail spacing and overlaps between pieces must remain consistent to avoid gaps. Even small gaps on rakes can let wind-driven rain move behind the metal and under the shingles, so careful overlap and fastening prevent these issues.
Why Professional Installation Matters
Working near the roof edge has risk. There is the safety factor for anyone on a ladder, and there is the risk of damaging shingles or the deck if the work is rushed. Professional installation from an experienced roofing contractor:
- Follows building code and manufacturer instructions.
- Uses the right length and type of fasteners.
- Protects your shingle warranty.
- Helps prevent leaks that appear months or years later.
We frequently see projects where someone tried a quick patch with caulk or short pieces of metal. Those patches last a season or two, then the leak returns, often worse than before. A careful drip edge installation is more reliable and usually more cost-effective over time.
Types of Drip Edge Used in Roofing Projects
Drip edges come in several profiles. Each style is best suited for specific roof systems. Our team installs different shapes based on roof pitch, gutter placement, and the overall structure of the home. Material thickness and metal type also matter. The goal is to select a profile that stays secure, resists corrosion, and supports the shingle system above it.
Type C Drip Edge
Type C has a simple shape that fits many standard roofs. The vertical and horizontal legs form a clean angle that sits well against the roof deck and fascia. Many Maryland homes built before 1990 used this style originally. We still install it today when the roof design calls for a straightforward profile.
Type D (T-Style) Drip Edge
Type D, sometimes referred to as T-style, extends farther outward to create more overhang. This profile directs water farther into the gutter. Homes in areas with frequent heavy rain benefit from the wider flare. The extended projection also serves roofs with steep pitches because water flows with more force down the slope.
Type F (Extended Fascia Drip Edge)
Type F offers the longest vertical leg. Installers primarily use it during re-roofing projects when the existing fascia line requires additional coverage. If a home has received gutter replacements in the past that altered the gutter height, Type F matches the new layout and maintains consistent water movement.
Materials Options for Drip Edges
RoofPRO installs drip edges in aluminum, galvanized steel, and copper. Aluminum offers excellent corrosion resistance and holds paint well. Steel supplies added durability, especially along the horizontal plane where shingles rest. Copper works for high-end architectural projects because it withstands decades of exposure and changes appearance over time. Many Maryland homes use aluminum or steel because they balance cost and performance.

Why Trust RoofPRO for Drip Edge Installation
Our team works on homes across Maryland year-round. We understand how local weather affects roof edges and gutters. During every project, we document the condition of the fascia, sheathing, and gutter system so homeowners can see what we see. We also follow the requirements from shingle manufacturers such as GAF, CertainTeed, and Owens Corning. This consistency protects warranty coverage and helps extend the life of the entire roof system.
We also help people understand how the drip edge fits into the larger roofing and gutter drainage system. When someone schedules an inspection, we walk through the roof’s condition in plain language and answer every question directly.
Schedule a Drip Edge or Roof Inspection Today
If you’ve noticed water staining, loose shingles near the edges, or gutter issues, an inspection can show what’s happening beneath the surface. We provide detailed photos, clear explanations, and straightforward recommendations based on your home’s needs. Use the contact form to schedule a visit. Our team will help you protect your home’s roof perimeter and keep the system performing through every season.

Author Bio
Tim Taylor – Owner & Founder of RoofPR
Tim Taylor began his roofing career in 2003 and founded RoofPRO in 2004 with a mission to fix the poor workmanship that often causes roof leaks. With over 20 years of hands-on experience, he’s earned elite credentials like CertainTeed’s ShingleMaster Wizard certification, HAAG inspection certifications, and OSHA safety training. His expertise in leak repair, flashing repair, and post-storm restoration has made RoofPRO one of Maryland’s most trusted roofing companies. Tim continues to lead with the same principle that built his reputation—roof it right the first time.

