Ever noticed how roofs have a sneaky habit of springing leaks at the worst possible moments? That’s where roof sealants come into play. This guide is going to help you understand everything there is to know about roof sealants, so you can protect your home before trouble knocks—or drips—at your door.
What Is Roof Sealant?
Put simply, roof sealant is a protective coating applied to your roof to prevent water and moisture from seeping through cracks and small openings. Think of it as a waterproof blanket for your roof, sealing up vulnerabilities before they become full-blown issues.
Now, don’t confuse sealants with roof coatings. Sealants tackle specific weak spots, while coatings are often applied to entire roof surfaces as a preventive measure. It’s the difference between patching a small hole in your jeans versus buying a whole new pair.
Sealant is primarily used to cover exposed fasteners in the flashing where you can’t avoid “face nailing” the flashing. Or along edges of metal like a chimney flashing. In these cases you need a sealant that will last as long as possible.
Choosing the Right Roof Sealant for Your Home
Selecting the ideal roof sealant isn’t just about grabbing whatever’s on sale at your local hardware store. You’ll want to consider several key factors:
- Roof material – Metal, asphalt shingles, tiles, each material pairs better with certain sealants.
- Climate conditions – Consider Maryland’s variable weather.
- Your roof’s current condition – A new roof might only need minor preventive sealing, while older roofs require stronger, more robust sealants.
- Your budget – Sealants vary widely in cost; some offer better value, while others provide longer-lasting protection.

Types of Roof Sealants Available
Not all roof sealants are created equal.
Silicone Roof Sealants
Silicone sealants are fantastic, especially if your roof is flat or metal. They’re extremely flexible, resist UV rays, and can handle Maryland’s blazing summers without breaking a sweat. Silicone is your go-to option if durability tops your checklist.
Acrylic Roof Sealants
Acrylic sealants are like the friendly, budget-conscious cousin in the sealant family. They’re easy to apply, affordable, and great for quick fixes. But here’s the catch, they’re less resilient in heavy water exposure, so they’re best used on roofs with solid drainage.
Polyurethane Roof Sealants
Polyurethane sealants are tough, weather-resistant, and perfect for areas prone to harsh conditions. They offer exceptional waterproofing and adhere strongly to most roofing materials, making them ideal for areas that Maryland’s storms regularly target.
Asphalt-Based Roof Sealants
If your home has asphalt shingles, asphalt-based sealants are probably your best friend. They blend seamlessly with your existing shingles, seal effectively, and won’t bust your budget. However, they don’t stretch as much as silicone or polyurethane, making them less ideal for roofs prone to frequent expansion and contraction.
DIY Risks and Common Mistakes
Many well-intentioned DIYers have learned the hard way that roof sealing isn’t as straightforward as slapping on some paint. Common DIY pitfalls include:
- Choosing the wrong sealant – Picking acrylic for a flat roof or asphalt sealant for a metal roof is like wearing sandals in the snow. It won’t end well.
- Improper surface preparation – Sealants won’t stick properly to a dirty or wet surface. Prepping your roof isn’t just advisable, it’s mandatory.
- Uneven application – Too thin? Too thick? Both can reduce effectiveness significantly.
Advantages of Professional Roof Sealing Services
Hiring professionals, like our team here at RoofPRO, comes with clear benefits:
- Expertise and experience – We’ve seen it all, from minor cracks to major roof nightmares.
- Warranty protection – DIY doesn’t come with guarantees, but we do. Peace of mind matters.
- Efficiency and speed – While you’re juggling weekends, we can complete most jobs efficiently, letting you focus on less stressful home projects.
At RoofPRO, our Maryland-based contractors know exactly what your roof faces each season. We tailor solutions specifically to your home’s unique needs.

Step-by-Step Roof Sealant Application Process
Let’s say you’ve decided to move forward, whether DIY or hiring professionals. What exactly does sealing a roof entail?
Preparing Your Roof Surface
Think of your roof as a canvas. The surface preparation is your primer, skip this step and your final product won’t stick. First up, thoroughly clean off all dirt, debris, mold, and algae. Power washing and gentle scrubbing with specialized roofing cleaners can do wonders here.
Next, inspect the roof carefully. Check for signs of wear, cracks, loose shingles, or weak spots. These need addressing before the sealant application, or you’ll be sealing problems in, not out.
Applying the Sealant
Time for the main event. For DIY applications, you’ll typically need rollers, brushes, or sprayers. Silicone and polyurethane sealants generally apply best with rollers or brushes, ensuring smooth, even coverage. Acrylic and asphalt-based sealants are often sprayed on, offering speedier application, but needing a steady hand to avoid uneven coats.
Apply the sealant evenly and methodically. Usually, one solid coat is sufficient, but sometimes two thinner coats ensure better protection and durability.
Curing and Post-Application Roof Inspection
Your freshly sealed roof needs curing time, typically anywhere from 24 to 48 hours under dry, moderate conditions.
Once the curing period ends, inspect your roof carefully. Look for areas that may require additional sealant or any spots you might’ve missed. This extra check ensures maximum protection against leaks, moisture, and damage.
Lifespan Of Your Sealant
Some sealants last only a few years, while higher-quality options can last 7+ years. This means the sealant often doesn’t last as long as the primary roofing material, and will require routine maintenance to keep it performing correctly.
Signs Your Sealant Needs Reapplication
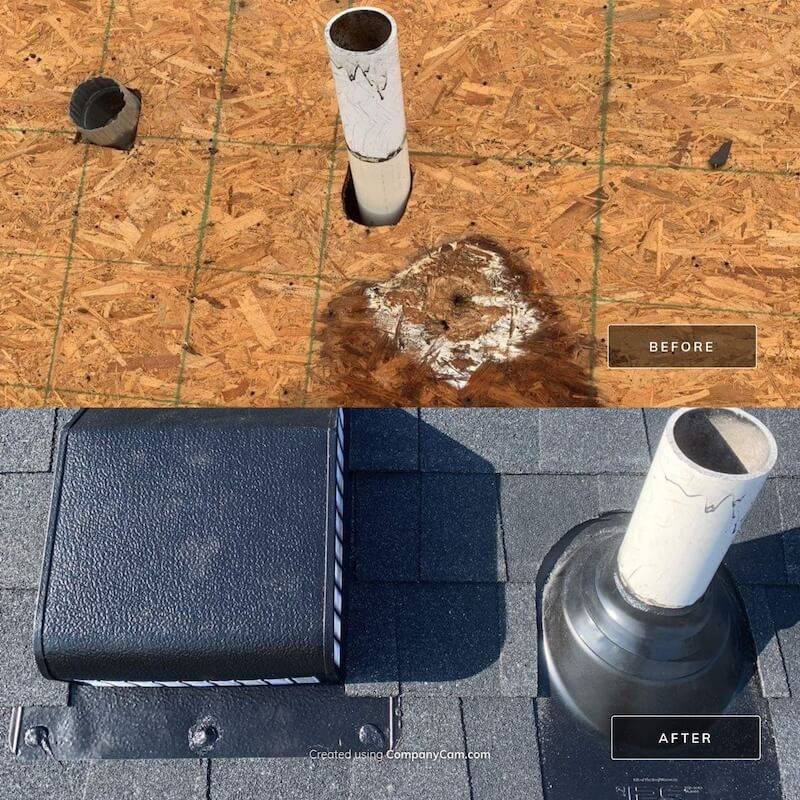
But how do you know it’s time to re-seal your roof? Regular inspections are crucial since sealant is often the first part of a roof to fail. Look for signs like visible cracks, peeling or bubbling sealant, leaks, and increased moisture in your attic or ceiling. It’s important to check it periodically. Pipe collars, chimneys, ridge vents, skylights, and apron flashing all require roof sealant.
Frequently Asked Questions (FAQs)
Sealants can effectively handle minor leaks and prevent new ones from forming. But they aren’t miracle workers. If you have major structural damage, flashing issues, or extensive leaks, sealants alone won’t solve the problem. A thorough inspection and possibly additional repairs would be necessary.
Maryland winters can be harsh, and sealant application ideally requires moderate temperatures (usually between 45°F to 85°F). Most professional roofers recommend sealing roofs during spring, summer, or early autumn to ensure the best results. Attempting application in freezing temperatures can compromise the adhesion and curing process, reducing effectiveness.
Ideally, your newly sealed roof needs at least 24 hours of dry, moderate conditions to cure properly. Check weather forecasts before you start, ensuring a solid window of clear weather. Silicone sealants cure quicker and are more resistant to early moisture exposure, while acrylic sealants often require longer drying periods.

Why Trust RoofPRO with Your Roof Sealant Needs?
At RoofPRO, sealing roofs is more than just another job—it’s about ensuring your home stays protected and secure through Maryland’s changing seasons. Our team has helped thousands of local homeowners navigate roof care, maintenance, and sealing projects with exceptional results. Check out our customer testimonials and you’ll see why RoofPRO is Maryland’s trusted roofing contractor.
Protect Your Maryland Home with RoofPRO’s Sealant Solutions
Don’t leave your home exposed to leaks and moisture damage. With RoofPRO, you’re partnering with experienced local professionals dedicated to protecting your roof, and your home.


