Siding is one of the most important parts of your home’s exterior, not only does it protect your house from the elements, but it also plays a huge role in your home’s curb appeal. When siding gets damaged, it can lead to serious issues like moisture infiltration, mold, and structural damage if it’s not addressed quickly and correctly.
While some homeowners attempt DIY siding patches, it’s easy to make mistakes that lead to bigger problems down the road. A poorly installed patch can leave gaps that allow moisture and pests to sneak in. At RoofPRO, we have the tools, experience, and know-how to handle siding repairs quickly and effectively, so you can have peace of mind knowing the job was done right.

Step-by-Step Guide to Professional Siding Patching
Siding repairs need to be done carefully and correctly to avoid causing more damage. Our expert team at RoofPRO follows a proven process to ensure the repair is secure, weatherproof, and visually seamless.
Step 1: Professional Inspection and Assessment
Before we touch a single piece of siding, we conduct a thorough inspection to assess the damage and determine the best course of action.
- Evaluate the Extent of the Damage – If the damage is widespread, a full panel replacement may be more effective than a patch.
- Check for Underlying Issues – If there is damage to the siding like a puncture, be sure to check behind the siding and make sure the house wrap, flashing tape and wood are still in good condition. If you don’t see house wrap or backer board, then you have a larger issue that needs to be addressed because every house needs house wrap.
Step 2: Determine the Color Match
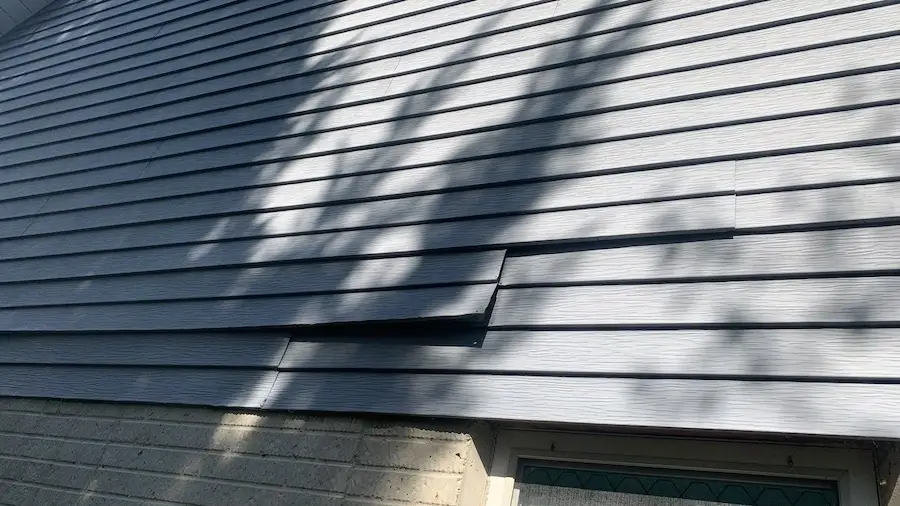
At RoofPRO, we use color-matching technology to find the closest match to your existing siding. This can be tricky with vinyl because siding manufacturers change product lines over time. The style, texture, and color of your original siding might no longer be available. Plus, even if you find a close match, new siding will likely look darker since older siding fades from exposure to sunlight.
A common solution is to take a piece of siding from a less visible part of the house, such as behind bushes, under an overhang, or on the back side of the house, and use that for the repair. Then, the new siding is installed in the less noticeable spot, ensuring that the repaired area blends in perfectly. This requires precision and a careful eye for detail, which is why it’s best handled by professionals.
Step 3: Removing the Damaged Siding and Cleaning the Area
Once we’ve assessed the damage, it’s time to carefully remove the affected area and prep the surface for the siding patch.
- Unlock the Siding with a Zip Tool – We use a siding zip tool to unlock the damaged panel without disturbing the surrounding pieces.
- Lift and Remove – Using a pry bar, we carefully lift the damaged piece away from the wall.
- Remove Nails or Clips – We take care to avoid damaging the surrounding pieces during removal.
- Remove Debris – Brush off any loose material, dirt, or peeling paint. A quick sweep with a stiff brush can do wonders.
- Clean the Area – Before installing the new piece, the area is cleaned to remove dirt, debris, and any loose material to ensure a secure fit.

Step 4: Cutting the Replacement Siding Patch
Once the damaged siding is removed, we cut a replacement piece to the exact dimensions.
- Measure and Cut Precisely – We use professional-grade measuring tools and a circular saw for a clean, straight cut that fits the space perfectly.
- Leave a Small Gap – Vinyl siding needs room to expand and contract, so we leave about a ¼-inch gap at the ends.
- Match the Profile – Siding panels have interlocking edges that need to match perfectly with adjacent pieces.
Step 5: Installing the New Siding
Now that the replacement piece is ready, it’s time to professionally install the siding on your home.
- Lock It Into Place – We carefully align the new piece and snap it into the surrounding panels using a siding zip tool.
- Ensure Proper Alignment – We use a level to make sure the piece is installed evenly and matches the surrounding siding.
- Check the Fit – Before sealing it, we make sure the piece is secure and flush with the adjacent panels.
Pro Tip: Over-nailing siding can cause it to warp or crack over time. Our team makes sure the siding is secure but not overly tight.
Step 6: Painting and Finishing
Once the new siding is installed and sealed, the next step is making sure it blends seamlessly with the rest of your home’s exterior. Even if you’ve matched the color and style of the replacement siding, natural fading from sunlight over time can make the new piece stand out. That’s where vinyl siding painting and finishing come in.

Understanding Your Siding
Before you pick up any tools to patch your siding, it’s essential to know what type of siding you’re dealing with. Siding isn’t one-size-fits-all, and each material requires a slightly different approach.
- Vinyl: Popular for its affordability and low maintenance, vinyl siding is everywhere in Maryland. It’s flexible, but that also means it can crack under extreme stress.
- Wood: Wood siding offers a classic, warm look but needs regular upkeep to prevent rot and pest damage.
- Fiber Cement: Combining durability with a natural wood-like appearance, fiber cement siding is robust, though it can be heavier and trickier to work with.
- Other Materials: There are also aluminum and stucco options, each with its own set of repair requirements.
Tools and Materials We Use
Patching siding requires more than just a quick fix, it takes the right tools, materials, and expertise to make sure the repair blends seamlessly with your existing siding. At RoofPRO, we use professional-grade tools and materials to ensure the highest quality repairs.
Maintenance Tips to Prevent Future Damage
Proper maintenance can help extend the life of your siding and prevent the need for future patches. Here’s what we recommend to keep your siding in top condition:
- Clean Your Siding Regularly – Use a soft brush or cloth and a mixture of mild soap and water. Avoid power washing, which can force water behind the siding.
- Inspect for Damage After Storms – High winds and hail can cause cracks, dents, and loose panels. Walk around your home after major weather events and check for visible issues.
- Trim Nearby Trees and Shrubs – Overhanging branches can scrape and damage siding in high winds. Keep bushes and trees trimmed back at least 12 inches from the siding.
- Monitor for Moisture Issues – Look for bubbling, warping, or discoloration, all signs of water damage. If you see any of these signs, call RoofPRO to inspect and repair the issue.
- Address Small Issues Quickly – A small crack or loose panel can quickly escalate into a bigger problem. Prompt professional repairs prevent more extensive (and expensive) damage.

Why Professional Siding Repairs Make a Difference
Sure, you could try to patch your siding yourself, but without the right tools and experience, it’s easy to create more problems than you solve. At RoofPRO, we handle siding repairs every day. Our team knows how to:
- Accurately diagnose the problem.
- Color match replacement siding.
- Properly install and seal the repair to prevent future issues.
- Ensure a clean, professional finish that blends with your home’s exterior.
DIY siding repairs often result in visible seams, mismatched colors, and structural gaps, but with RoofPRO, you’ll get a seamless repair that protects your home from the elements and enhances its curb appeal.
Frequently Asked Questions About Patching Siding
We often hear similar questions from homeowners about siding repairs. Here’s what you need to know:
When professionally done, a siding patch can last for 10–20 years, depending on the material and maintenance conditions.
It’s possible, but cold weather can make vinyl siding brittle and harder to work with. Professional installers know how to handle these conditions to prevent damage.
If the siding is more than 20–25 years old and showing signs of widespread cracking, fading, or warping, replacement may be more cost-effective than patching.
It depends on the extent of the damage and the age of your siding. Our RoofPRO team can assess the condition and recommend the most cost-effective solution.
If the damage is isolated to a small area, a patch is usually enough. If the damage extends across multiple panels or involves structural issues, a larger replacement may be necessary.


